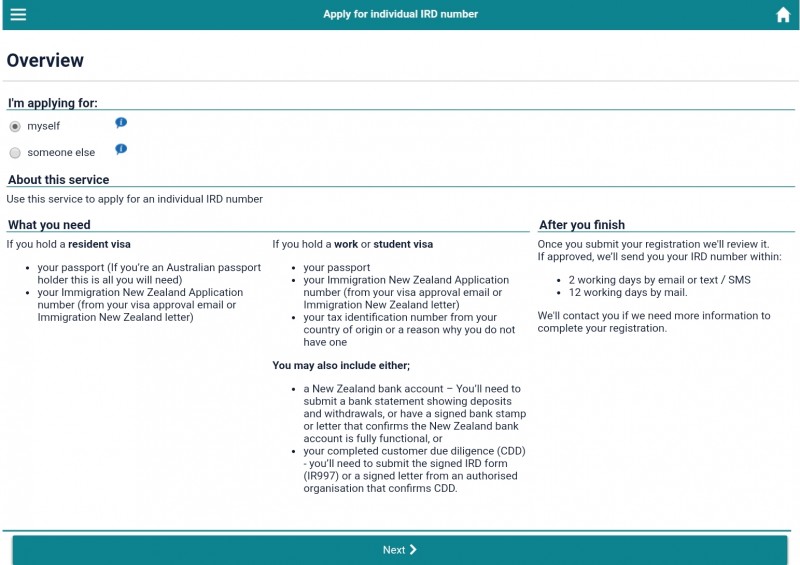
This page lists the required documents, depending on your situation. The documents required for working holiday makers are listed in the second column (“if you hold a work or student visa”).
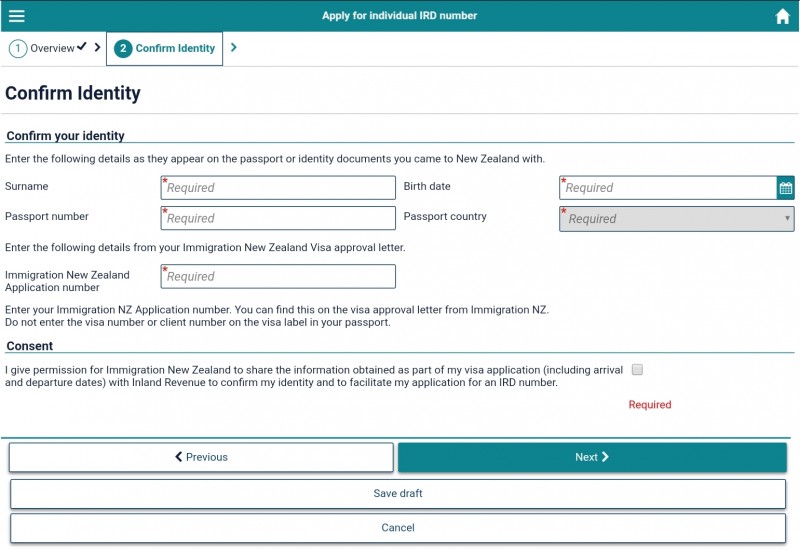
- Surname
- Birth date: click the button on the right to use the calendar.
- Passport number: usually found in the top right-hand corner of the identification page (photo page) of your passport.
- Passport country: the country issuing your passport (and if you have dual citizenship, remember to use the passport details you provided when you applied for your WHV!).
- Immigration New Zealand application number: not to be confused with the client number on your visa.
Then, you’re asked to give your consent for Immigration New Zealand to share your information with the Revenue Department. Don’t forget to tick the box; it’s a mandatory step to continue with your application.
Click “Next” to move on to the Applicant Information section.
Applicant Information section
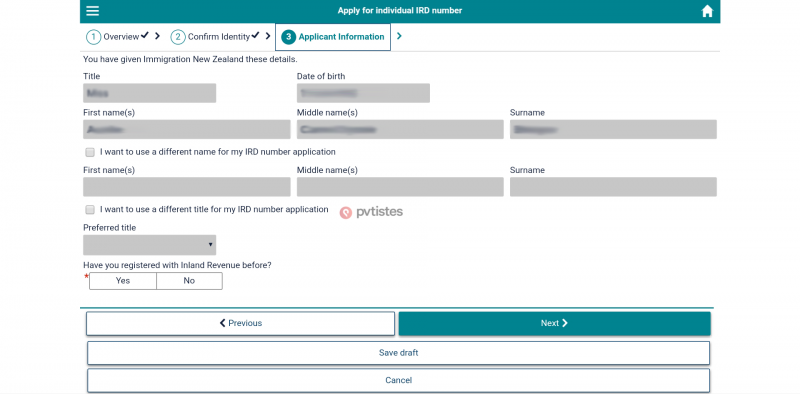
In most cases, you don’t need to tick the two boxes offering you the option of using another title or name when applying for an IRD number.
If you’ve never applied for an IRD number before (if you’ve never lived in New Zealand, you will not normally have applied for an IRD number), select “No” and click “Next.”
Contact Information section
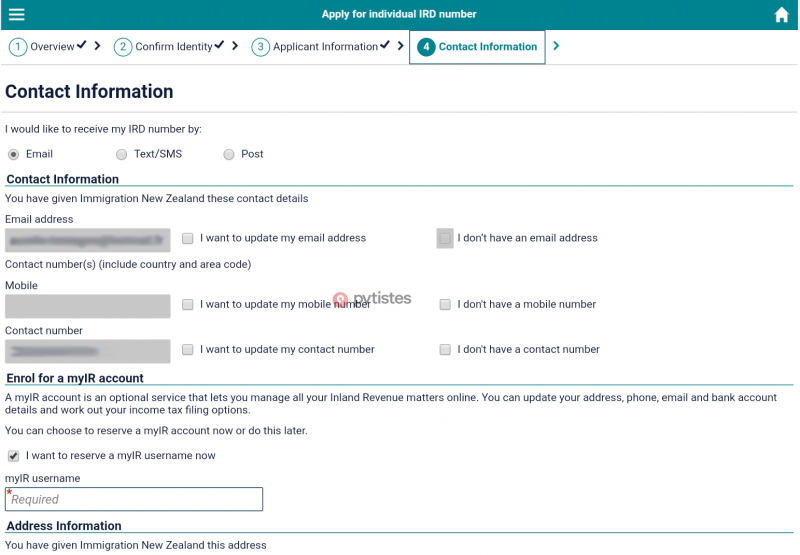
You can choose how your IRD number will be sent to you (email, text/SMS or post. Note the first two options are the quickest).
Contact information
Under “contact information,” you will find the information you provided when you applied for your New Zealand WHV. You can update your email address or telephone number.
If you decide to receive your IRD number by text message, we recommend that you provide a New Zealand number and not your foreign number (otherwise, you may not get the text message). If you don’t have a New Zealand telephone number yet, it’s best to have your IRD number sent by email to avoid any problems.
Enroll for myIR account
You can choose the username you will use for myIR account. With this account, you will be able to update your information later on and, most importantly, declare your income online and possibly get a tax return.
Write down your username—you will need it later to call the Inland Revenue Department and get your password. You will need to provide personal information over the phone (your surname[s], first name[s], date of birth, nationality and any other information that could help identify you). Don’t lose your username!
Address information
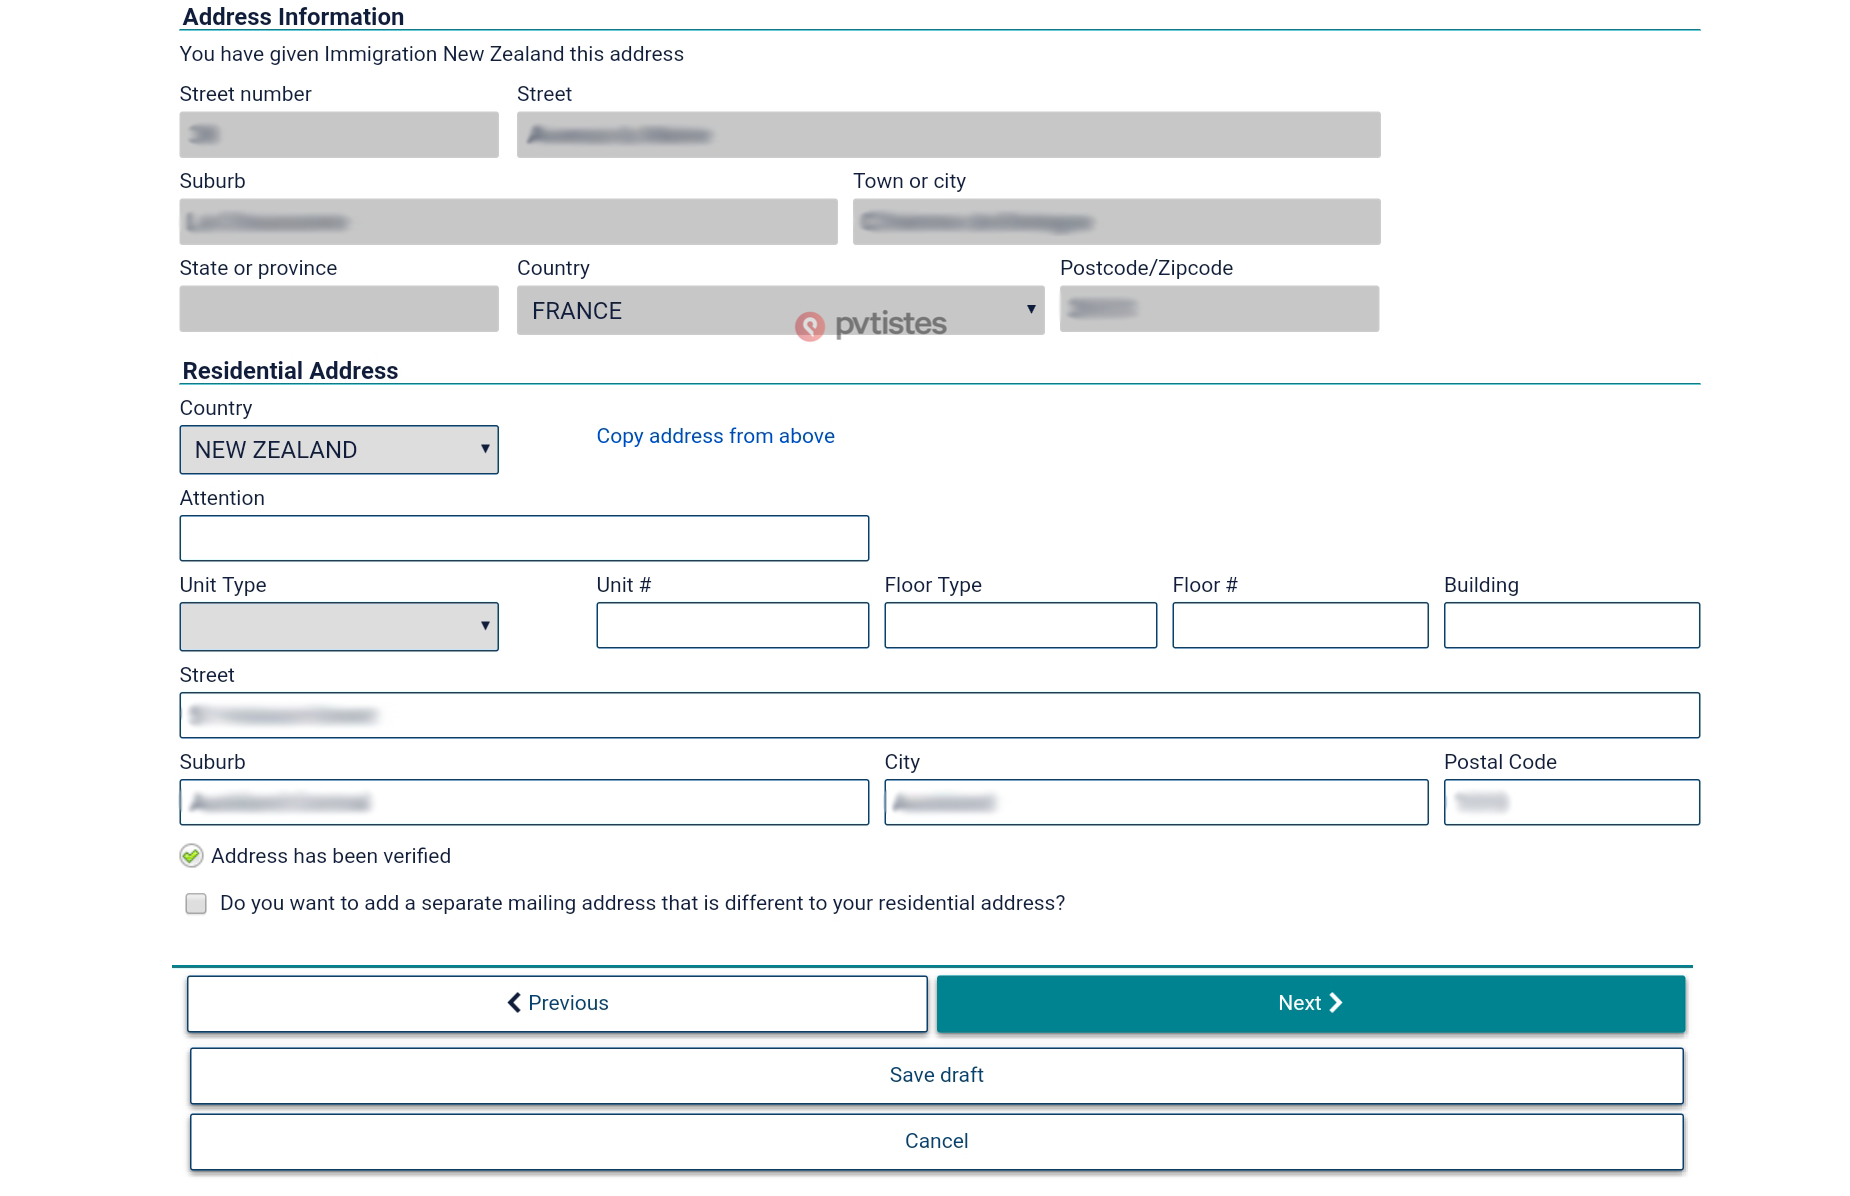
This is the address you provided when you applied for your WHV. Click on “I want to update my residential address” to provide an address in New Zealand (even if it’s a temporary address, you must provide an address in New Zealand). Click “Next.”
Registration Information section
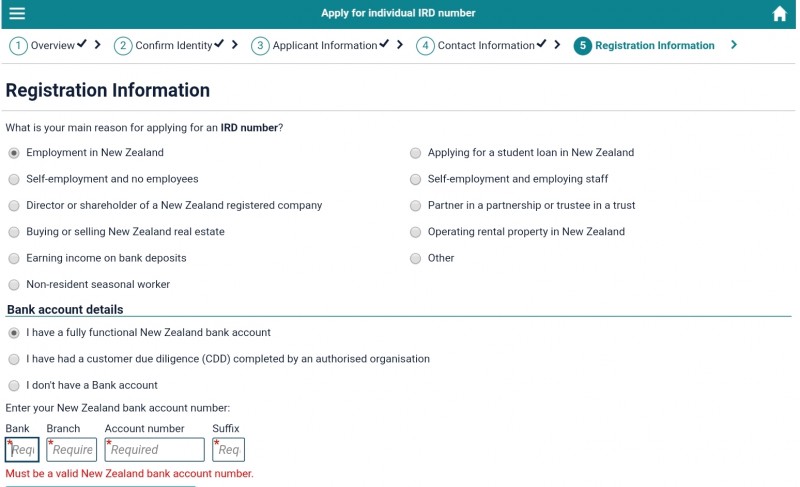
What is your main reason for applying for an IRD?
If you want to work for an employer, select “Employment in New Zealand.”
Bank account details
If you already have a New Zealand bank account, you will be asked to provide your account details. If not, once you’ve opened a bank account, you will need to give the information to the Inland Revenue Department.
- If you do have a bank account in New Zealand, tick “I have a fully functional bank account in New Zealand” and enter your account details. You will have to upload a “form of evidence”—click “Upload bank account information” and provide a bank statement or bank letter (PDF, JPG, PNG, or GIF format).

- If you don’t have a bank account, tick “I don’t have a bank account.” You will then be able to add it to your myIR profile after you receive your first payslip.
Tax residency information

In this section, you must provide the “tax identification number” (TIN) from your country of origin. For example, Canadians have to enter their Social Insurance Number. If you don’t have a TIN (e.g. you’ve just turned 18 and you’ve never paid taxes), explain why.
Click “Next.”
Review section
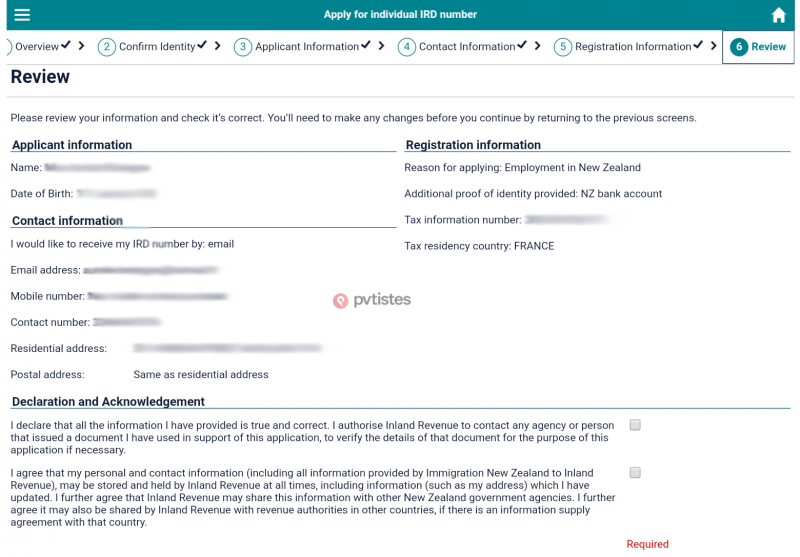
On the next page, you will find a summary of the information you have just provided. Make sure that all the information is correct. If not, click on “Previous” to go back and amend as needed. Double-check your email address, New Zealand phone number and postal address to avoid having your IRD number sent to the wrong place.
Click “Submit.”
Confirmation section

On the next page, you will see a message confirming that your application has been submitted, together with a confirmation number. Print the page, take a screenshot or write the number down. You will need it if you don’t receive your IRD number and need to call the Inland Revenue Department.
Please note that your IRD application number is not your IRD number (which you will need to give to your employers). It is simply a reference number for tracking your application.
That’s it, your IRD number application is now complete! Wait a few days and you should receive your IRD number by email, text message, or in the post.


 Français
 English





0 comments
{{like.username}}
Loading...
Load more