Completing your application — Work and education details
In this last part, you will need to list your professional experience and your education.
The Government of Canada reminds you that:
- You shouldn’t leave any gaps in time in your work history and education history sections. Include all absences, periods of unemployment, travel dates, etc.
- You should include all paid and unpaid work in the work history section.
Remember that you’re asked to include the city and country for your work experience, i.e. the city where you were studying or working. If you took online classes, enter the city where you were, not the city where the institution is. Same if you were working remotely for a company—enter the place where the work was completed, not the actual location of the company.
Work history tab
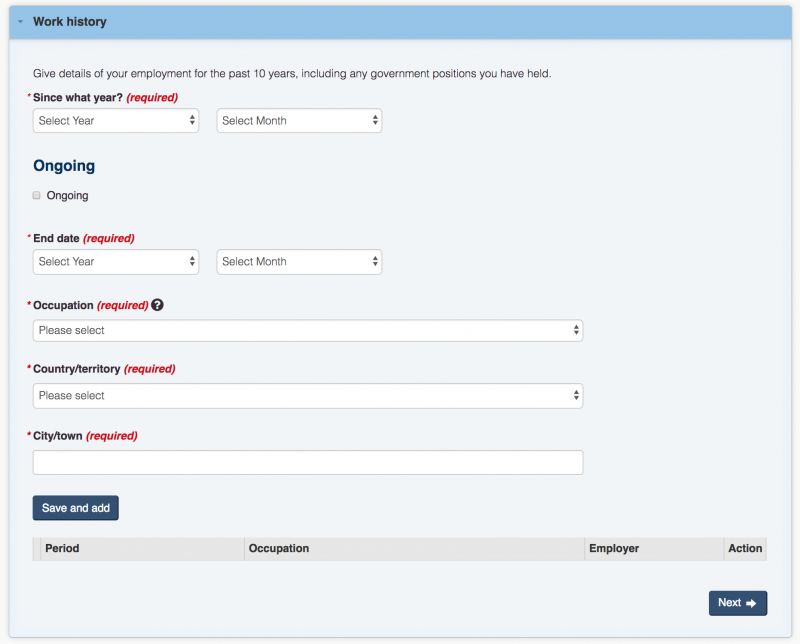
In this section, you are asked to list your last ten years of work experience. However, you should try and go back as far as when you were 18, otherwise you can be asked follow-up questions by the Canadian government. You can start with your most recent dates and work backwards or use a reverse chronological order (no details are provided regarding the format). This section can take a while to complete. Make sure you have all the info handy (dates, places, etc.) and write them out in a separate document first to check for any gaps.
For each of your work experiences (and you must list them all!):
- Enter the start date
- Enter the end date (if it’s your current position, tick “Ongoing”)
- Select the best match for “Occupation”
- Enter the company name of the company
The job description best matching a specific occupation is a long, non-alphabetical list. If you need more information on specific occupations, check out the National Occupational Classification. Note that an “occupational group” (“unit group”) can include several job titles. After you find your NOC code, use the first three digits to find your job title in the National Occupational Classification Matrix, then choose the job title from the list.
If you were unemployed for a period of time, enter it.
If you were an intern—paid or unpaid—enter your job title. You can specify “internship” on the CV/Resume you will have to upload as a supporting document.
Click the “Save and add” button and move on to your next work experience in your employment history. Repeat the process for each work experience. You’ll see them listed in the table at the bottom of the page. To make a change, click on the “Edit” button on the right side in the table.
Education history tab
In this section, you must list the universities, colleges or post-secondary institutions you attended, much like you listed your work experience.
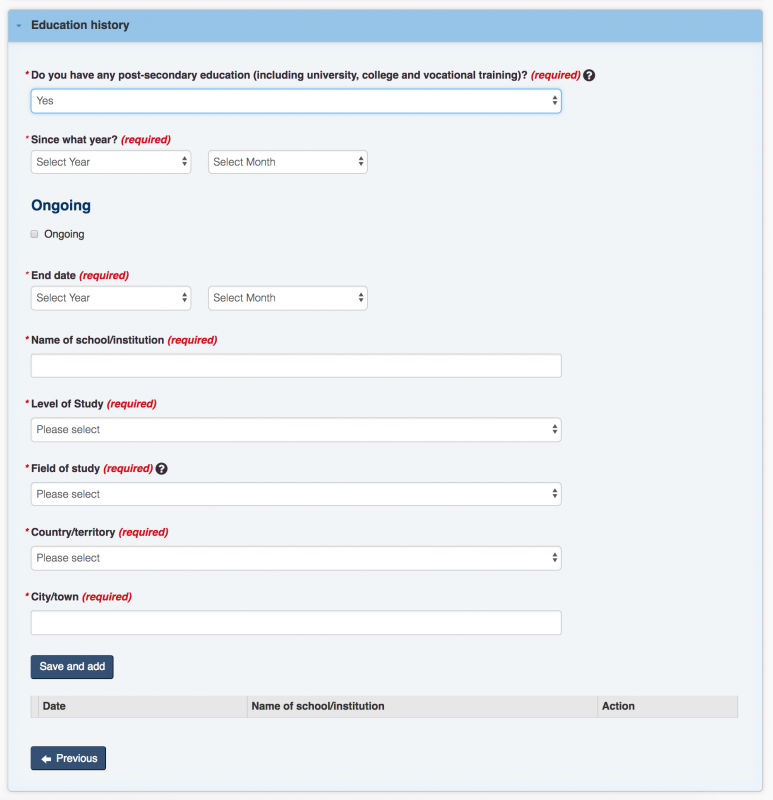
If you only completed high school and don’t have any post-secondary education, answer “No” to the first question. It won’t impact your IEC application.
If you answer “Yes” to the first question, you must provide information on your post-secondary education:
- Enter the start and end date of your program. If you’re still a student, tick the “Ongoing” box.
- You also have to select an education level:
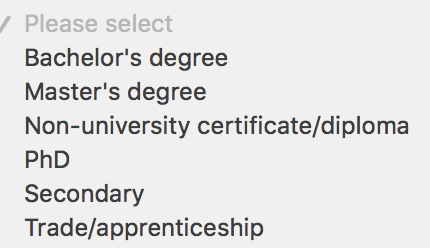
- A “Bachelor’s degree” is usually a three or four year university degree
- A “Master’s degree” is usually a second cycle one or two year degree
- A “Non-university certificate/diploma” can be a post-secondary certificate or diploma from a community college; a CEGEP (either general/pre-university or technical; a Quebec-specific college); an institute of technology; a school of nursing; a private business school; a private or public trade school; or a vocational school
- A “PhD” is the highest academic degree awarded by universities in most countries
- “Trade/apprenticeship” refers to a hands-on training program for people who want to work in a skilled trade, such as a bakery or carpentry
For more info, read Degree equivalency — find out what your degree is comparable to in Canada.
You also have to enter your field of study, the name of the school/institution, the city or town and the country where the program was completed. If applicable, you may see another field for the province or state.
If you started a program but haven’t graduated (dropped out, didn’t complete all the courses, etc.) enter it. You can always give more details on the CV/Resume you will have to provide as a supporting document.
If you attended different institutions or have several degrees, click “Save and add” and add more post-secondary education after listing the higher degree/level of education completed.


 Français
 English



0 comments
{{like.username}}
Loading...
Load more