


- Chapter 1: Introduction to the IEC program
- Chapter 2: Create your IRCC account
- Chapter 3: Submit your profile to the pools
- Chapter 4: The Invitation to Apply (ITA)
- Chapter 5: Complete your application — Fill in applicant details
- Chapter 6: Complete your application — Upload supporting documents, submit and pay
- Chapter 7: Biometrics
- Chapter 8: Await approval, activate IEC permit
Complete your application — Fill in applicant details
There are two main parts to the application process: completing the application form and uploading the supporting documents. In this chapter, we will go through each section of the application form. Use the buttons below to navigate to a specific section:
1. Personal details of applicant
Names tab

If you have used another name in the past, select “Yes” and enter your former last name in the field. You’ll have to specify whether it’s your maiden name, a former name, etc.
Personal description tab
You will need to provide your date of birth, country/territory of birth, city/town of birth, and gender.
Marital status tab
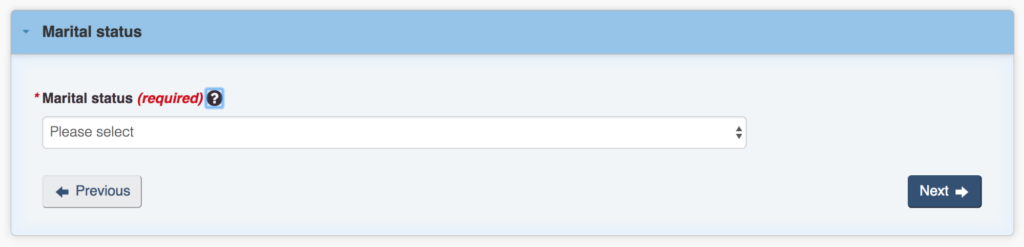
- If you select “Married”, you must enter the date of your marriage.
- If you select “Common-law”, you must enter the date of the first anniversary of when you moved in together.
If you answer “Yes” to the question “Have you been previously married or in a common-law relationship?” you must provide information regarding your previous spouse or partner and the length of the relationship.
Language details tab
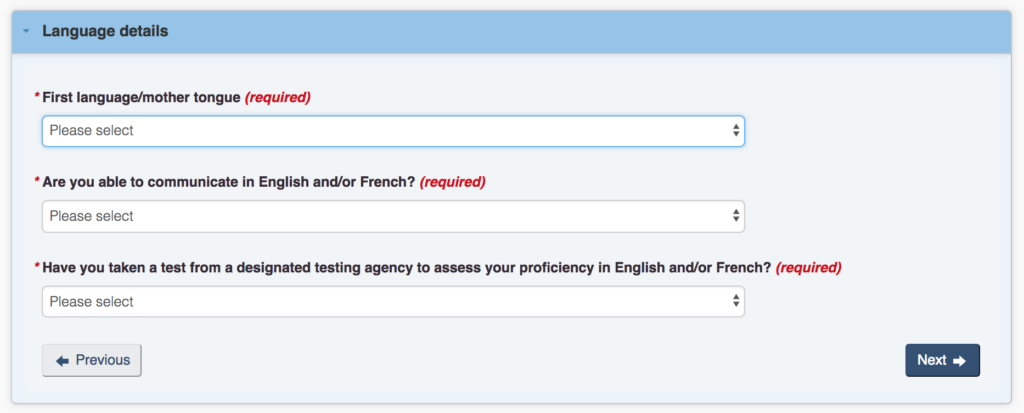
- If you select you are fluent in both English and French, you’ll be asked which one you are most comfortable with.
- If your first language isn’t English or French, you must select the one you’re most comfortable with.
- You will be asked if your English or French language skills have been assessed by an approved third-party organisation. This question is for data purposes only. There are no language requirements for IEC work permits and your answers won’t impact your application or chances of success.
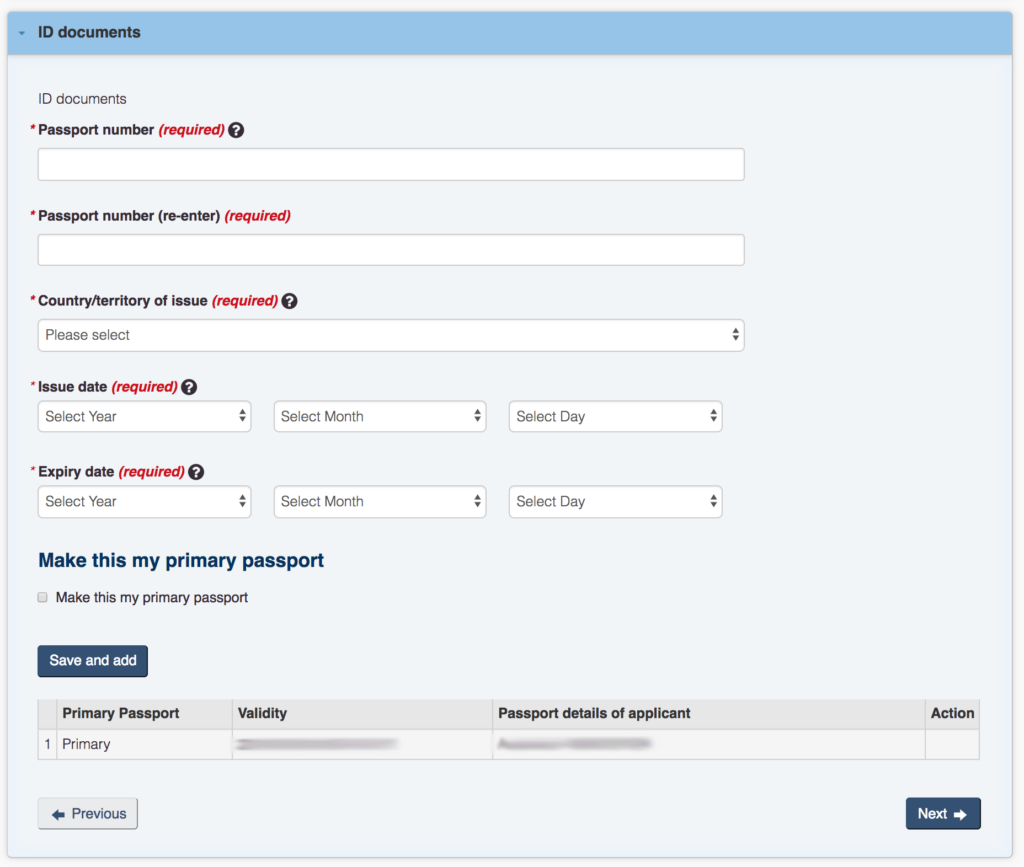
ID documents tab
You will see the passport information you provided when you submitted your profile to the pool. If you have since gotten a new passport, you can update the information. Check the box to make this new passport your “primary passport”.
National identity document
If you don’t have a national identity document, answer “No”. Not every country uses national identity documents.
Immigration history and citizenships tab
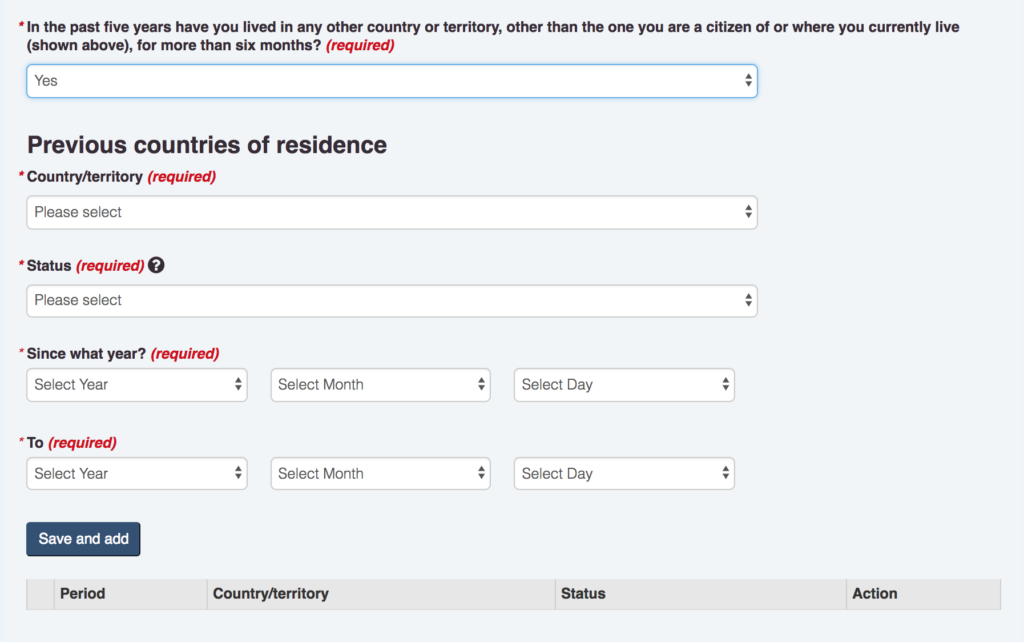
If you have lived abroad for more than six months consecutively in the last five years, enter the country/territory and dates. Click “Save and add.” You’ll see your previous country of residence and the period you lived there listed in the table:
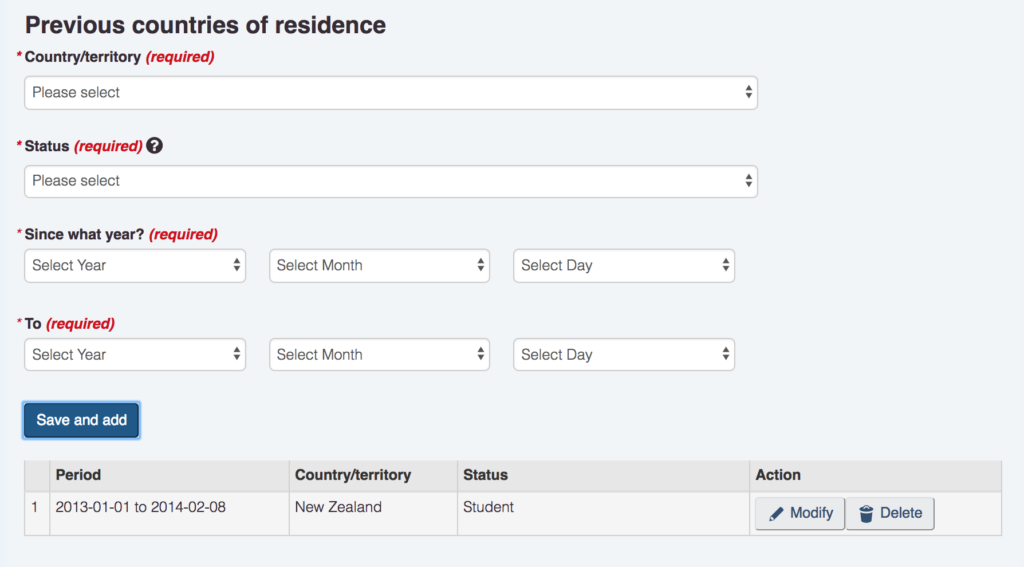
Notes:
- If you were living in another country on a Working Holiday Visa, choose the status “Worker”.
- You’ll have to provide a police certificate for any country where you lived for more than six months since the age of 18 (even if you’re not listing them here because you lived there more than five years ago). We cover police certificates in more depth in Chapter 6.
- If you have lived in one or more countries that Canada designates as having risk factors for tuberculosis, be prepared to take a medical exam. If you see “YES” in the “Immigration Medical Exam (IME) required” column, you will need to read the section on medical exams in Chapter 6.
Additional citizenship(s)
If you have another citizenship, select the appropriate country and click “Insert row.”
Former visa or permanent residence application for Canada

You have to state whether you’ve ever applied for a visa or permit (temporary or permanent) to Canada:
- If you went to Canada with an eTA or tourist visa, a temporary work permit, an internship work permit, or a student permit, answer “Yes.”
- If you applied for an IEC work permit (before this current application), answer “Yes”, regardless of whether your application was accepted or rejected, or whether you actually travelled to Canada or not.
Unique client identifier (UCI) number
If you have ever been issued a permit or visa by IRCC, you will have a UCI number. You’ll find your UCI number on your former Port of Entry (POE) letter or your previous work or study permit. If you can’t remember your UCI number, it is fine to leave the field blank.
2. Contact information
Language of correspondence tab
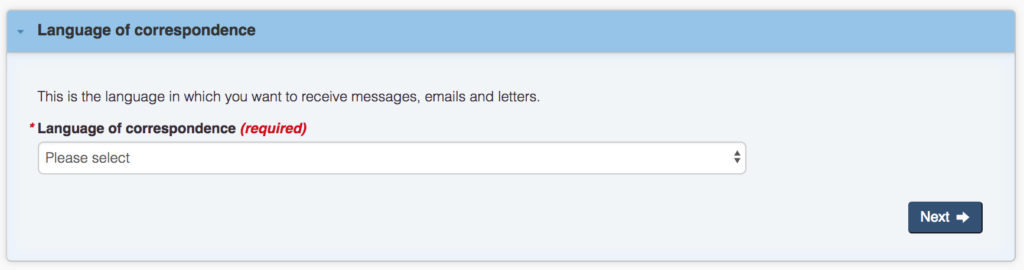
In this tab, you can choose one of Canada’s two official languages—English and French.
We recommend choosing English if you are comfortable using English. That way, if you need to send any correspondence to another country (e.g. sharing the request for a police certificate from the Government of Canada with the country you live in), it will be easier if the letter is in English.
Email tab
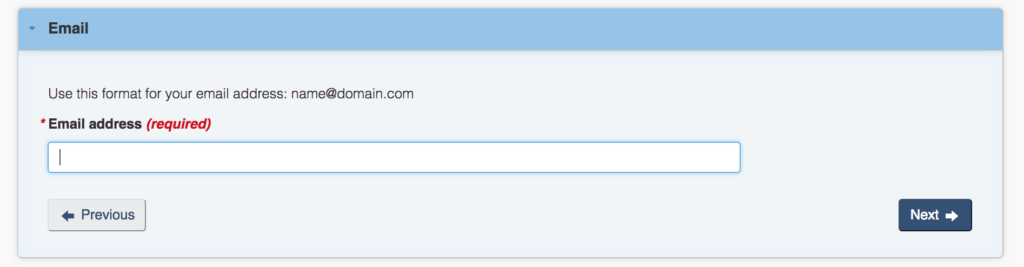
You’ll see the email address you previously provided. Change it if needed.
Telephone tab
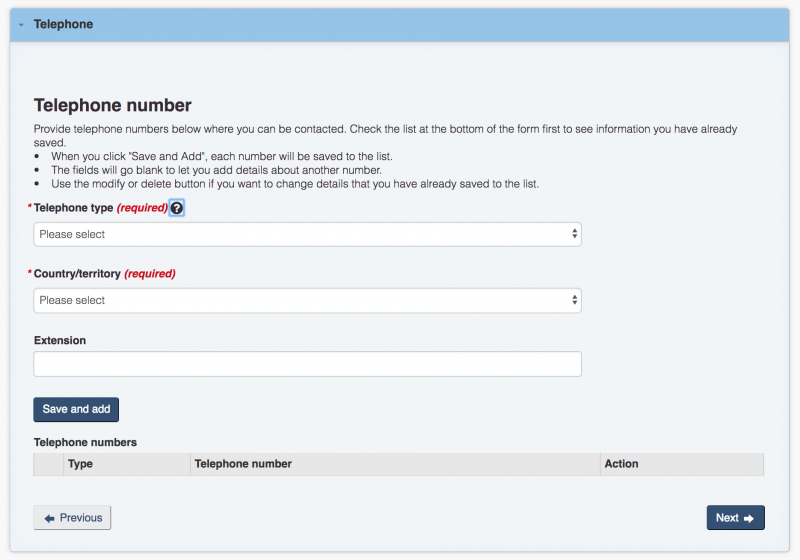
You can enter multiple phone numbers if needed. Just click on “Save and add” after each number.
Address tab
Residential address

For “Residential address”, this is your current address. In the “From” field, enter the date (as best you can remember) that you moved to your current address.
Mailing address

If your mailing (postal) address is different from your residential address, enter the details here.
Note: Certain citizenships have a residency requirement to be eligible for IEC (check your citizenship here). This means you must have a permanent address in your country of citizenship to be able to apply. If you are living abroad temporarily, you must provide a permanent residence address in your country of citizenship to be eligible.
3. Work and education details
In this section, you will need to list your professional experience and your education.
The Government of Canada reminds you that:
- You shouldn’t leave any gaps in time in your work history and education history sections. Include all absences, periods of unemployment, travel dates, etc.
- You should include all paid and unpaid work in the work history section.
You must include the city and country where you were studying or working. For example, if you are a remote worker, enter the location where you completed the work, not the location of the company you work for. If you study online, enter the location where you took the classes, not where the institution is based.
Work history tab
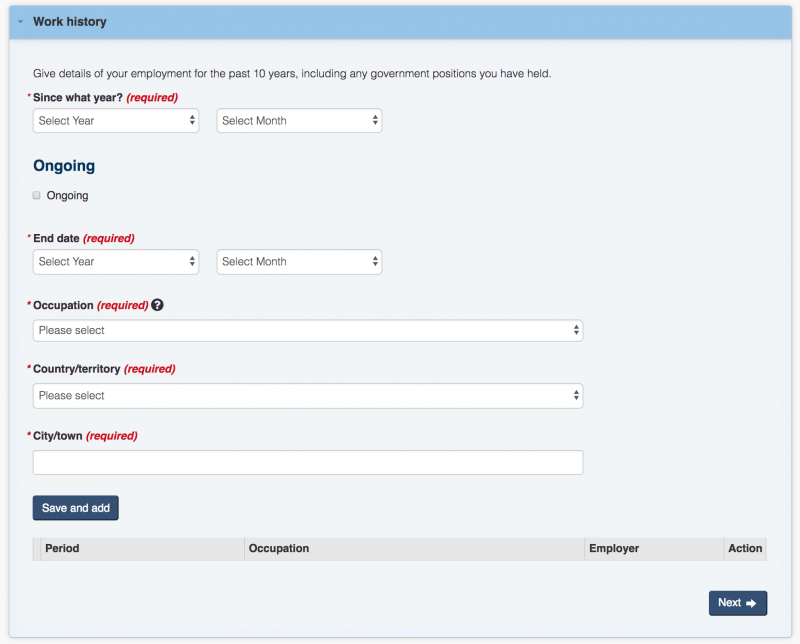
You should go back as far as when you were 18, even if this is more than the 10-year period they ask for. You can start with your most recent dates and work backwards or use a reverse chronological order; as long as no gaps are left, it doesn’t matter. Write the details out first in a separate document first to check for any gaps!
For each work experience (and you must list them all, whether it was paid or unpaid work):
- Enter the start date
- Enter the end date (if it’s your current position, tick “Ongoing”)
- Select the best match for “Occupation”
- Enter the company name
If you were unemployed for a period of time, enter it.
If you were an intern—paid or unpaid—enter your job title. You can specify it was actually an internship on the CV you will provide as a supporting document (covered in Chapter 6).
Click “Save and add” to add each work experience in your employment history. Repeat the process until you can see all your work experience listed in the table at the bottom of the page. To make a change, click “Edit” on the right-hand side of the table.
Education history tab
In this section, list the universities, colleges, or post-secondary institutions you attended, much like you listed your work experience.

If you only completed high school and don’t have any post-secondary education, answer “No” to the first question. It won’t impact your IEC application.
If you answer “Yes” to the first question, you must provide information on your post-secondary education. Enter the start and end date of your course. If you’re still a student, tick “Ongoing”.
Select the closest matching education level:
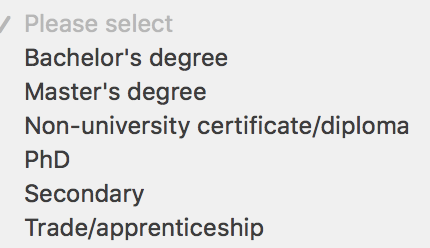
For more info, read Degree equivalency — find out what your degree is comparable to in Canada.
You also have to enter your field of study, the name of the school/institution, the city/town and the country where the studies were completed.
If you started a degree but never graduated (e.g. dropped out), still enter the details. You can give more details on your CV. If you have several degrees, click “Save and add” to add more rows.
4. Application details
Previous participation in IEC tab
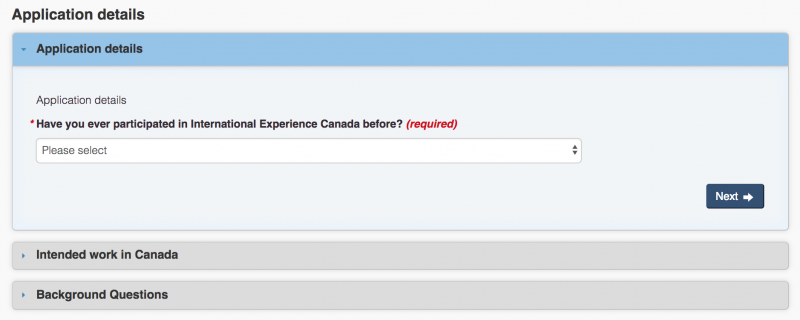
You will be asked if you have already participated in IEC. A “participation” in IEC means you previously entered Canada and activated an IEC permit. If you previously applied for an IEC permit but did not travel to Canada and activate the permit, this does not count as a participation.
If you answer “Yes,” you must indicate the date your first IEC permit was activated in Canada.
Intended work in Canada tab

You can see the type of work permit you’re applying for in grey (i.e. you can’t update it). If this is incorrect, you will need to withdraw your profile (see “What if I made a mistake?” in Chapter 3).
You have to answer: “Do you want to work in one of the following jobs?” If you plan to work in any of the fields listed, you must take a medical examination.
If you plan to work in one of these fields but answer “No” to skip the mandatory medical examination, your work permit will have the following condition attached: “Not authorised to work in 1) child care 2) primary or secondary school teaching 3) health services field occupations.” Changing your work permit conditions (including taking the medical exam at a later date) will be a long and costly process, so answer honestly here.
If you answer “Yes”, you will be required to submit proof of a medical exam with your supporting documents (see Chapter 6 for more info).
Young Professionals and International Co-op applicants only
Offer of employment number and compliance fee payment
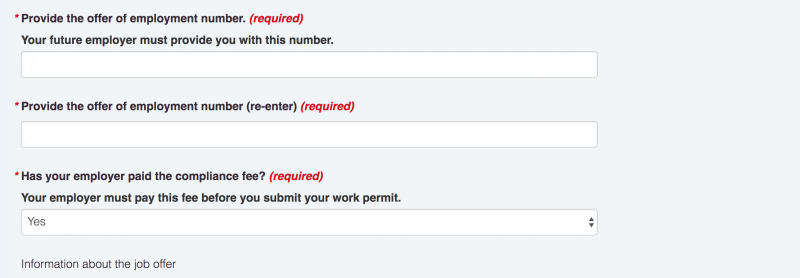
First, you must enter the offer of employment number your employer received after submitting the job offer through the Employer Portal. The number format is A9999999 (one letter followed by seven digits).
Second, make sure your employer has paid the employer compliance fee before answering “Yes”.
Information about the job offer
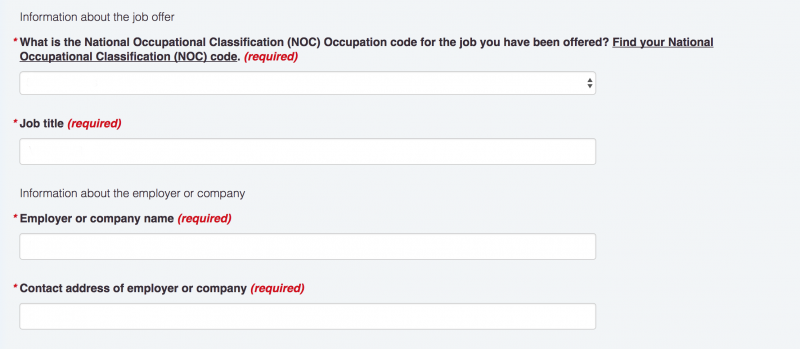
Enter the four-digit National Occupational Classification (NOC) code matching your job or internship offer. Check with your employer for the code, as they would have needed it to submit the offer through the Employer Portal. Read more about the NOC in Working in Canada: what is meant by TEER categories 0, 1, 2, 3, 4 and 5?
Enter your job title, the name of your employer, and their contact information.
In the “intended location of employment and duration of contract” section, enter the address of your future employer, as well as your contract start and end dates.
Background questions tab
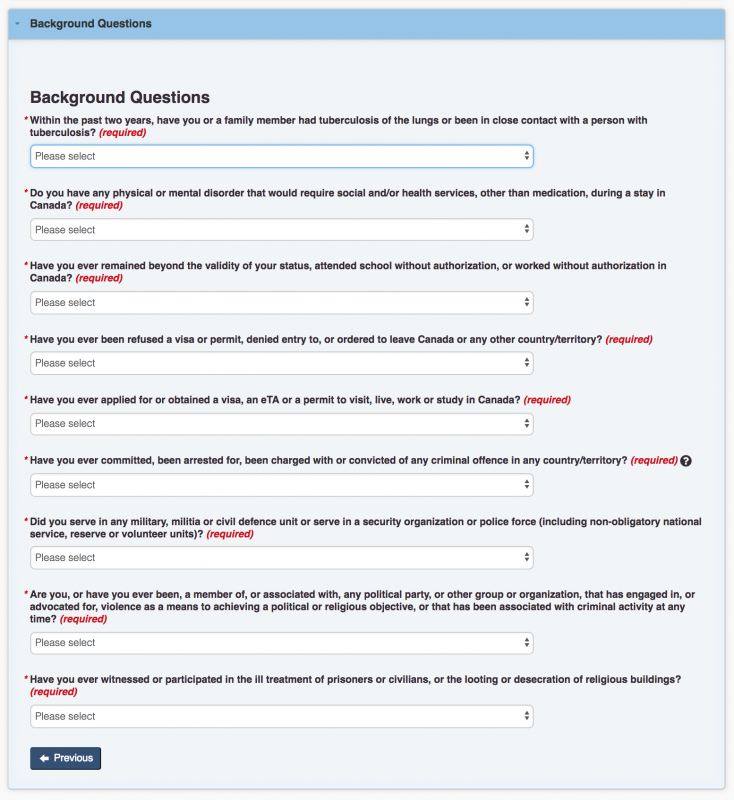
Questions regarding your medical history
If you answer “Yes” to one of the first two questions, you must provide further details in the field below. You will be required to take a medical exam with a panel physician and you could also be asked to provide a letter from your usual general practitioner.
Note: Immigration officers don’t usually refuse entry to Canada on health grounds, as long as the person isn’t contagious. However, be aware that costs and management of treatment in Canada may be expensive.
Questions regarding failure to comply with Canadian immigration laws
Read these three questions carefully if you’ve been to Canada before.
Note that if you have ever overstayed, been denied a visa, or denied entry to Canada, you must answer honestly. It may impact your chances of being approved for an IEC permit.
Answer “Yes” to “Have you ever applied for or obtained a visa, an eTA or a permit to visit, live, work or study in Canada?” if this is applicable to you. Provide details of what you applied for in the field below.
Criminal record
If you have a criminal record, you’ll be asked to provide a copy of an official record of criminal conviction. You may also be asked for documents providing further information, such as payment of any fines, proof of sentences served, etc.
Failure to disclose information can have serious consequences, such as inadmissibility or prosecution. Remember that immigration officers can perform background checks on applicants.
Depending on the nature of the crime, you may need to apply for rehabilitation before you can be considered for entry into Canada (either as a visitor or as part of the IEC program). The rehabilitation process can take as long as 12 months, so start the process well ahead of when you want to join the pools.
Once you’re done filling out each section, you should see a green checkmark and “Complete” beside each row of the table:

Carefully review the information provided and make changes as needed. Click the blue “Continue” button at the bottom of the page to move on to uploading your supporting documents.


(4)Comments
At the end of every season the pools are emptied and you have to make a new inscription the next season. Yes, in general season stops around october/november and the new season starts end of december, beginning of january.
To ask a whv in Canada Italian have de be resident in Italie. IRCC says : "prove that you are a resident of Italy at the time of submitting your application;"
So for you its better to mention Italie as country of residence and not the Netherlands. If you mention the Netherlands you won't be able to enter the pool.
{{like.username}}
Loading...
Load more